

Handwriting House
As children learn how to form letters, some structure and guidance is necessary. Many children first begin writing on blank paper which is totally fine. They then typically move on to the paper with a top and bottom line and a dotted line in the middle. This helps students learn where to start and finish letters and how to form them using the given lines. Sometimes those three lines are enough for a student to learn to form letters correctly, but for some, they are not enough. There are many, many different stories, songs and rhymes out there to teach students how to form their letters and they all work- some more than others. But this technique is my favorite and the one I used in my classroom and have used a bit with my son. This is something that has been around the classroom for a long time and every teacher has his or her own way of using it. This is my way.
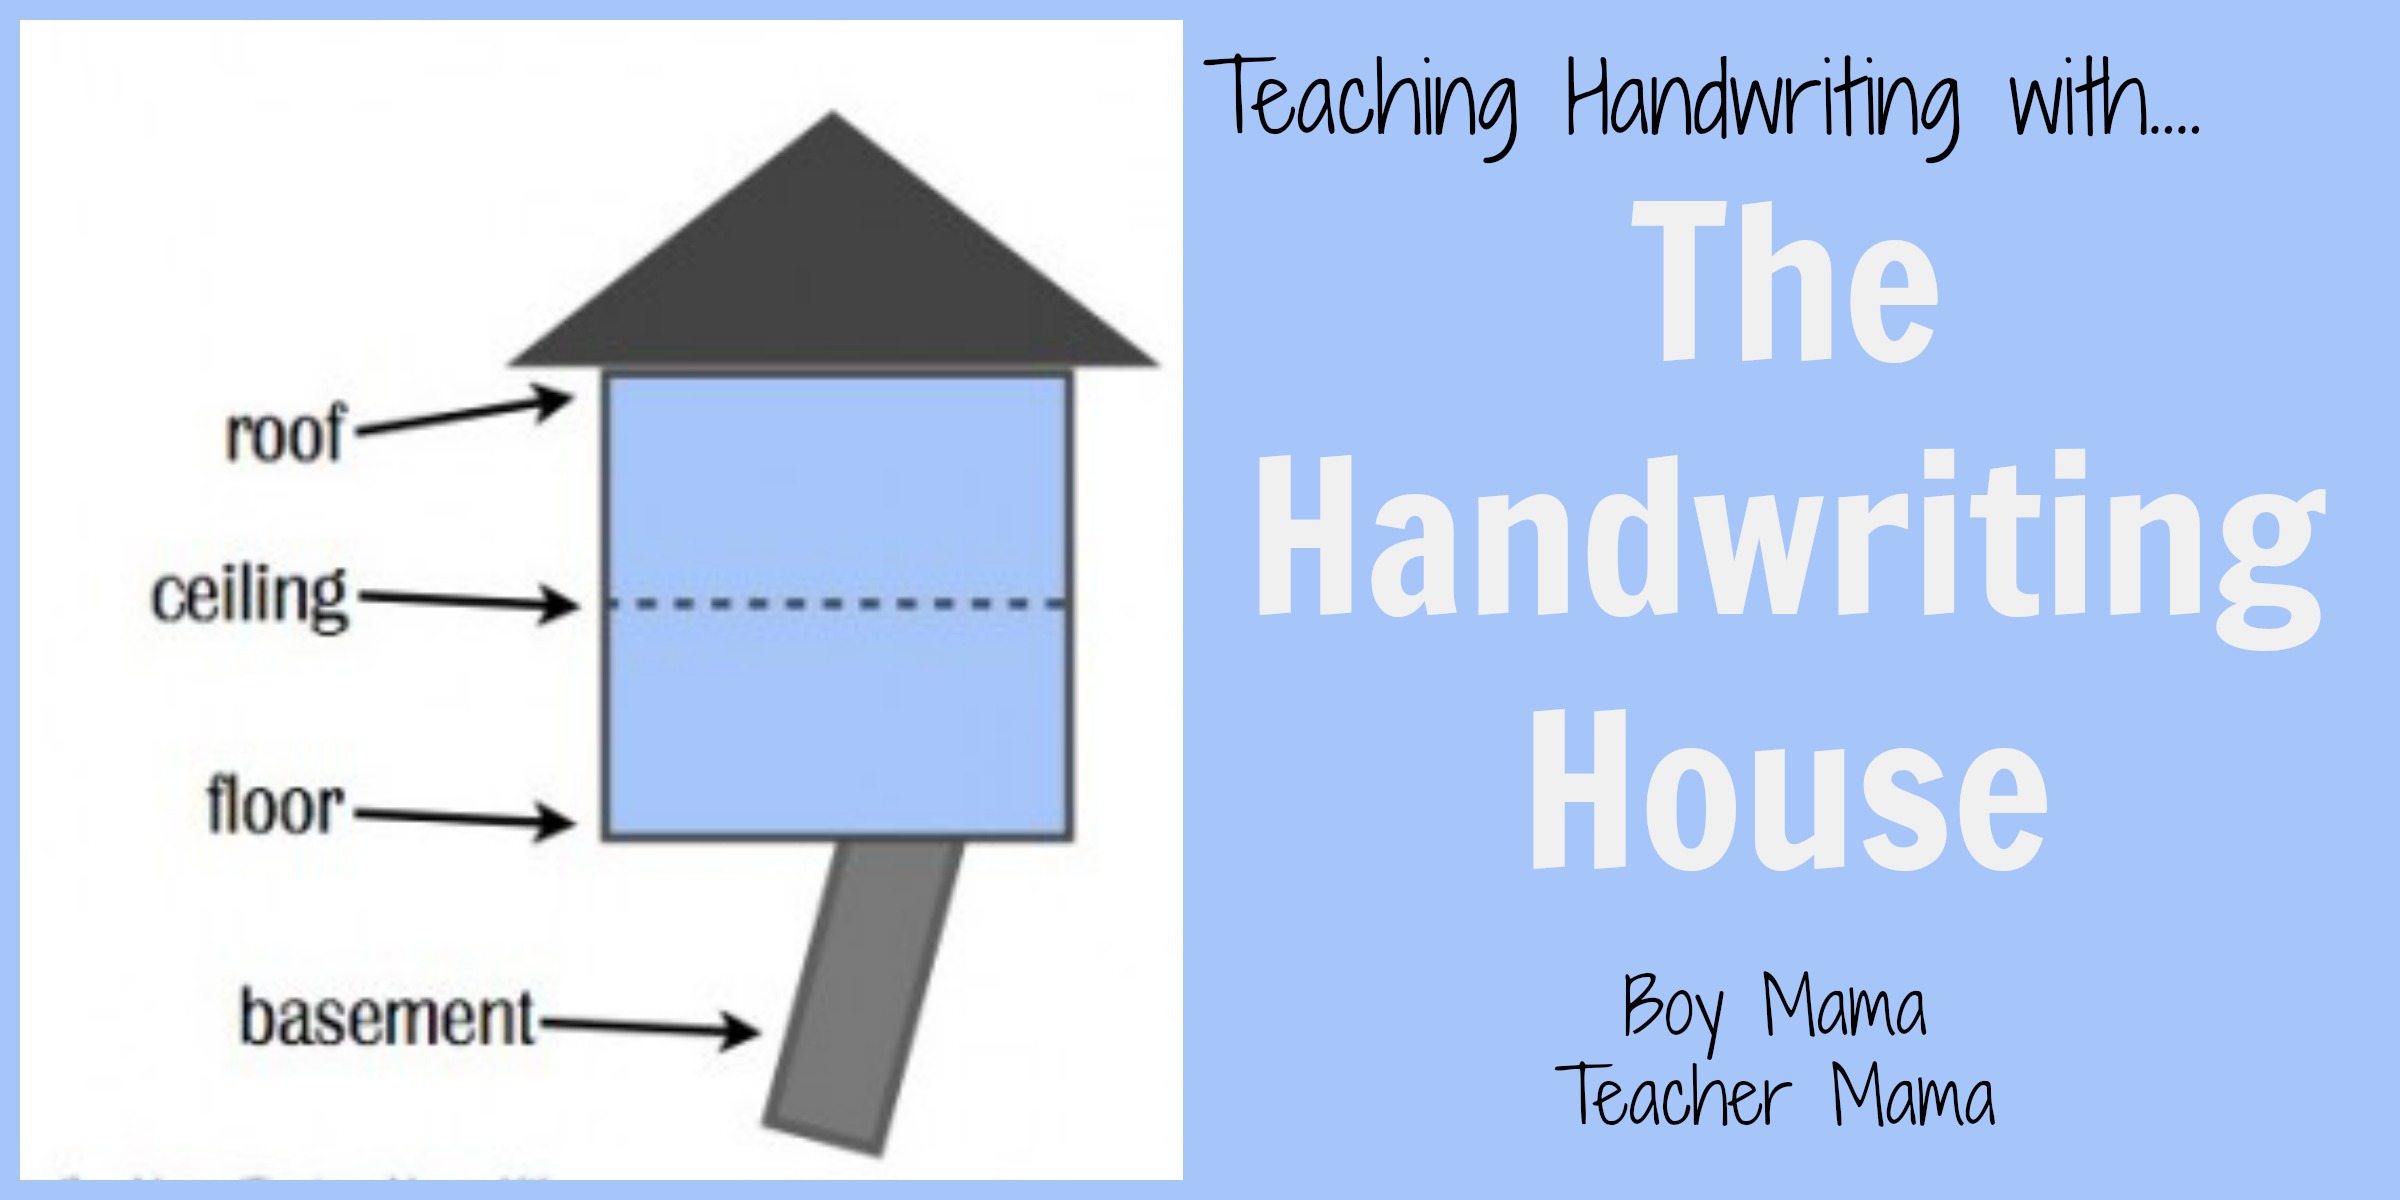
This is an example of the set of lines typically used when teaching young students handwriting- both print and cursive. By itself, to a young child, this could be a bit daunting and even ambiguous. By adding a simple “story” to these lines, they become familiar and give children visual guidelines for forming letters.

Now imagine that these lines are no longer just lines. Now they are a house- something almost all children can relate to. The bottom line becomes the floor, the middle line the ceiling, the top line the roof and the area below the bottom line is the basement. All written letters fit into this house in some way or another. Some letters stay only on the first floor or between the floor and ceiling while others reach from the floor all the way to the roof. Still others, and there are only a few, get to go to the basement. Children love this little house and the stories of the letters that go with it.

When teaching children how to form a letter, I always create a simple story to go with it- this provides both visual and auditory guidance and it is, well, just plain fun. For example, if I were teaching my students the lower case “t,” this is how I would do it.
First, I would review the lines of the house. I would have the children squat as if they were standing on the floor, then stretch their hands up to reach the ceiling and finally stand as tall as they can to reach the roof. Then, bend over and take a look down in the basement to see what is happening way down there. (Remember, boys learn best when moving) Then we might practice a few letters we already worked on especially if they are similar to the letter we are about to learn. Then I would say, “Today we are going to learn how to make the lower case “t.” The lower case “t” is a TALL letter. It cannot fit on the first floor, it needs lots of room to stand tall. When making the “t,” we start all the way at the roof and draw a line down from the roof straight down to the floor. Then we pick up our pencil and cross our “t” at the ceiling.” As we are talking, I am, of course, modeling this on the classroom board or on a piece of paper (if working one to one with a child). Students have white boards or chalk boards for practicing.
Here are some examples of letters that…
Go to the Roof

Go to the Ceiling

Go into the Basement

If you like this post, check out, Spaceman for Writing, to see more ideas about handwriting.
If this is your first time visiting Boy Mama Teacher Mama, welcome! Did you know that you can also find us on Facebook, Pinterest, Twitter and G+? Stop by to see what is happening!
© Boy Mama Teacher Mama 2012
All Rights Reserved

Pingback: Teacher Mama: Spaceman (for Writing) | Boy Mama Teacher Mama
Very helpful- I like the idea of using a story to describe the structure of the letters